Introduction
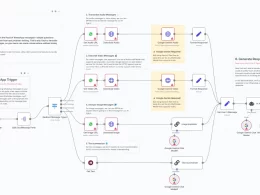
n8n is a powerful workflow automation tool that helps you connect apps and automate tasks without writing code. Installing n8n on an Ubuntu VPS using Docker is the most efficient and maintainable approach for production environments. This comprehensive guide walks you through every step of setting up n8n on your Ubuntu server using Docker containers.
What you’ll learn:
- Prerequisites for installing n8n on Ubuntu
- Docker and Docker Compose installation
- n8n configuration and deployment
- Security best practices
- Common troubleshooting tips
Table of Contents
Getting Your Ubuntu VPS Server
If you don’t have already a Ubuntu VPS Server, I highly recommend Hostinger VPS for running n8n. Hostinger offers reliable, high-performance virtual private servers with excellent uptime and competitive pricing that’s perfect for automation workflows.
Why Choose Hostinger for n8n?
- Pre-installed Ubuntu options – Start with Ubuntu 20.04, 22.04, or 24.04 LTS
- SSD storage – Fast disk performance for smooth workflow execution
- Full root access – Complete control over your server configuration
- Easy scaling – Upgrade resources as your automation needs grow
- IPv4 & IPv6 support – Future-proof networking
- 99.9% uptime guarantee – Keep your workflows running 24/7
- Weekly backups – Protect your n8n data automatically
- 24/7 customer support – Expert help when you need it
Recommended VPS Plans for n8n:
| Plan | RAM | Storage | Best For | Monthly Price |
|---|---|---|---|---|
| KVM 1 | 4GB | 50GB SSD | Small workflows, testing | ~$5.99 |
| KVM 2 | 8GB | 100GB SSD | Production use, multiple workflows | ~$8.99 |
| KVM 4 | 16GB | 200GB SSD | Heavy automation, large datasets | ~$18.99 |
Get Started with Hostinger VPS:
👉 Get Hostinger VPS with Special Discount 👈
After signing up, you’ll receive your server credentials via email within minutes. Once your VPS is ready, you can SSH into your server and follow the installation steps below.
Quick Hostinger Setup:
- Sign up for Hostinger VPS plan
- Choose Ubuntu as your operating system
- Select your server location (choose closest to your users)
- Receive your server IP and root credentials
- Connect via SSH and start the installation
Prerequisites
Before you begin installing n8n server on Ubuntu with Docker, ensure you have:
- Ubuntu VPS Server (20.04 LTS, 22.04 LTS, or 24.04 LTS recommended)
- Root or sudo access to your server
- Minimum 1GB RAM (2GB+ recommended for production)
- 10GB free disk space minimum
- Domain name (optional but recommended for SSL)
- Basic command-line knowledge
Step 1: Update Your Ubuntu System
First, connect to your Ubuntu VPS via SSH and update the system packages:
sudo apt update && sudo apt upgrade -y
This ensures your system has the latest security patches and package versions.
Step 2: Install Docker on Ubuntu
Docker is required to run n8n in a containerized environment. Follow these steps to install Docker:
2.1 Remove Old Docker Versions
sudo apt remove docker docker-engine docker.io containerd runc
2.2 Install Required Packages
sudo apt install -y apt-transport-https ca-certificates curl software-properties-common gnupg lsb-release
2.3 Add Docker’s Official GPG Key
curl -fsSL https://download.docker.com/linux/ubuntu/gpg | sudo gpg --dearmor -o /usr/share/keyrings/docker-archive-keyring.gpg
2.4 Add Docker Repository
echo "deb [arch=$(dpkg --print-architecture) signed-by=/usr/share/keyrings/docker-archive-keyring.gpg] https://download.docker.com/linux/ubuntu $(lsb_release -cs) stable" | sudo tee /etc/apt/sources.list.d/docker.list > /dev/null
2.5 Install Docker Engine
sudo apt update
sudo apt install -y docker-ce docker-ce-cli containerd.io docker-buildx-plugin docker-compose-plugin
2.6 Verify Docker Installation
sudo docker --version
sudo docker compose version
You should see version information for both Docker and Docker Compose.
2.7 Add Your User to Docker Group (Optional)
To run Docker commands without sudo:
sudo usermod -aG docker $USER
newgrp docker
Step 3: Create n8n Directory Structure
Organize your n8n installation by creating a dedicated directory:
mkdir -p ~/n8n-docker
cd ~/n8n-docker
This keeps all n8n-related files in one location for easy management.
Step 4: Create Docker Compose Configuration
Create a docker-compose.yml file for n8n:
nano docker-compose.yml
Add the following configuration:
version: '3.8'

services:
  n8n:
    image: n8nio/n8n:latest
    container_name: n8n
    restart: unless-stopped
    ports:
      - "5678:5678"
    environment:
      - N8N_HOST=${N8N_HOST}
      - N8N_PORT=5678
      - N8N_PROTOCOL=${N8N_PROTOCOL}
      - NODE_ENV=production
      - WEBHOOK_URL=${WEBHOOK_URL}
      - GENERIC_TIMEZONE=${TIMEZONE}
    volumes:
      - n8n_data:/home/node/.n8n
      - ./local-files:/files

volumes:
  n8n_data:
    driver: local
Save and exit (CTRL+X, then Y, then Enter).
Step 5: Configure Environment Variables
Create a .env file to store your configuration:
nano .env
Add your environment variables:
# Replace with your actual domain or IP
N8N_HOST=your-domain.com
N8N_PROTOCOL=https
WEBHOOK_URL=https://your-domain.com/
TIMEZONE=Europe/Berlin

# For IP-only setup (no domain)
# N8N_HOST=your.server.ip.address
# N8N_PROTOCOL=http
# WEBHOOK_URL=http://your.server.ip.address:5678/
Configuration Variables Explained:
| Variable | Description | Example |
|---|---|---|
N8N_HOST | Your domain or server IP | automation.example.com |
N8N_PROTOCOL | HTTP or HTTPS | https |
WEBHOOK_URL | Full webhook URL | https://automation.example.com/ |
TIMEZONE | Server timezone | Europe/Berlin |
Save and exit the file.
Step 6: Start n8n Container
Launch n8n using Docker Compose:
docker compose up -d
The -d flag runs the container in detached mode (background).
Verify n8n is Running
Check container status:
docker compose ps
View logs:
docker compose logs -f n8n
Press CTRL+C to stop viewing logs.
Step 7: Access n8n Web Interface
Open your web browser and navigate to:
- With domain:
https://your-domain.com - Without domain:
http://your-server-ip:5678
You’ll be prompted to create your first admin account. Follow the on-screen instructions to complete the setup.
Step 8: Configure SSL with Nginx (Recommended)
For production environments, secure your n8n installation with SSL using Nginx as a reverse proxy.
8.1 Install Nginx
sudo apt install -y nginx
8.2 Install Certbot for SSL
sudo apt install -y certbot python3-certbot-nginx
8.3 Create Nginx Configuration
sudo nano /etc/nginx/sites-available/n8n
Add this configuration:
server {
    listen 80;
    server_name your-domain.com;

    location / {
        proxy_pass http://localhost:5678;
        proxy_http_version 1.1;
        proxy_set_header Upgrade $http_upgrade;
        proxy_set_header Connection 'upgrade';
        proxy_set_header Host $host;
        proxy_cache_bypass $http_upgrade;
        proxy_set_header X-Real-IP $remote_addr;
        proxy_set_header X-Forwarded-For $proxy_add_x_forwarded_for;
        proxy_set_header X-Forwarded-Proto $scheme;
    }
}
8.4 Enable Configuration
sudo ln -s /etc/nginx/sites-available/n8n /etc/nginx/sites-enabled/
sudo nginx -t
sudo systemctl restart nginx
8.5 Obtain SSL Certificate
sudo certbot --nginx -d your-domain.com
Follow the prompts to complete SSL setup.
Step 9: Configure Firewall
Secure your server with UFW firewall:
sudo ufw allow OpenSSH
sudo ufw allow 'Nginx Full'
sudo ufw enable
Check firewall status:
sudo ufw status
Essential Docker Commands for n8n Management
Here are the most useful commands for managing your n8n installation:
| Command | Purpose |
|---|---|
docker compose up -d | Start n8n container |
docker compose down | Stop n8n container |
docker compose restart | Restart n8n container |
docker compose logs -f | View real-time logs |
docker compose pull | Update to latest n8n version |
docker compose ps | Check container status |
Updating n8n to Latest Version
Keep your n8n installation up-to-date:
cd ~/n8n-docker
docker compose pull
docker compose down
docker compose up -d
This pulls the latest n8n image and restarts the container.
Backup and Restore
Backup n8n Data
docker compose down
sudo tar -czf n8n-backup-$(date +%Y%m%d).tar.gz -C / var/lib/docker/volumes/n8n-docker_n8n_data
docker compose up -d
Restore from Backup
docker compose down
sudo tar -xzf n8n-backup-YYYYMMDD.tar.gz -C /
docker compose up -d
Troubleshooting Common Issues
Issue 1: Container Won’t Start
Solution: Check logs for errors:
docker compose logs n8n
Issue 2: Permission Denied
Solution: Ensure proper permissions on the n8n data directory:
sudo chown -R 1000:1000 /var/lib/docker/volumes/n8n-docker_n8n_data
Issue 3: Port Already in Use
Solution: Check what’s using port 5678:
sudo lsof -i :5678
Change the port in docker-compose.yml if needed.
Issue 4: Cannot Access Web Interface
Solution: Verify the container is running and firewall rules are correct:
docker compose ps
sudo ufw status
Issue 5: Webhook URLs Not Working
Solution: Ensure WEBHOOK_URL in .env matches your actual domain and protocol.
Performance Optimization Tips
Increase container resources if you’re running complex workflows:
services:
  n8n:
    # ... existing config ...
    deploy:
      resources:
        limits:
          memory: 2G
        reservations:
          memory: 512M
Enable execution data pruning to save disk space by adding to environment variables:
EXECUTIONS_DATA_PRUNE=true
EXECUTIONS_DATA_MAX_AGE=168  # Keep for 7 days
Security Best Practices
- Use strong passwords for your n8n admin account
- Enable SSL/TLS for encrypted connections
- Keep n8n updated regularly
- Limit access using firewall rules
- Use environment variables for sensitive data
- Regular backups of your workflow data
- Monitor logs for suspicious activity
- Use a reverse proxy like Nginx
- Implement rate limiting on your reverse proxy
- Enable two-factor authentication when available
Advanced Configuration Options
Custom Database (PostgreSQL)
For production workloads, use PostgreSQL instead of SQLite:
version: '3.8'

services:
  postgres:
    image: postgres:15
    container_name: n8n-postgres
    restart: unless-stopped
    environment:
      - POSTGRES_USER=n8n
      - POSTGRES_PASSWORD=your_secure_password
      - POSTGRES_DB=n8n
    volumes:
      - postgres_data:/var/lib/postgresql/data

  n8n:
    image: n8nio/n8n:latest
    container_name: n8n
    restart: unless-stopped
    ports:
      - "5678:5678"
    environment:
      - DB_TYPE=postgresdb
      - DB_POSTGRESDB_HOST=postgres
      - DB_POSTGRESDB_PORT=5432
      - DB_POSTGRESDB_DATABASE=n8n
      - DB_POSTGRESDB_USER=n8n
      - DB_POSTGRESDB_PASSWORD=your_secure_password
      # ... other environment variables ...
    volumes:
      - n8n_data:/home/node/.n8n
    depends_on:
      - postgres

volumes:
  n8n_data:
    driver: local
  postgres_data:
    driver: local
Conclusion
You’ve successfully learned how to install n8n server on Ubuntu with Docker. This setup provides a robust, containerized workflow automation platform that’s easy to maintain and update. With Docker Compose, you can manage your n8n instance efficiently, scale as needed, and ensure your automation workflows run reliably.
Next Steps
- Explore n8n’s workflow templates
- Connect your favorite apps and services
- Set up automated backups
- Join the n8n community for support
- Consider upgrading to n8n Cloud for managed hosting
Useful Resources
- Official n8n Documentation: https://docs.n8n.io
- n8n Community Forum: https://community.n8n.io
- Docker Documentation: https://docs.docker.com
- n8n GitHub Repository: https://github.com/n8n-io/n8n